

Greetings and welcome to the thirteenth blog post of: My Experience. For more information about this series click here. In this blog post we will look at combining Obsidian and Omnivore to enhance your note taking process.
If you want to read related content about Obsidian, please go to the end of the post for an overview.
Table of Contents
Introduction
In this blog post we will look at how you can enhance your notes in Obsidian by combining it with Omnivore. This tool can be used for free and will help you digest content you find on the internet. By linking highlighted content to your notes and only saving the most valuable information.
In this blog post I will explain:
- What Omnivore is;
- How to set up the Omnivore Integration with Obsidian;
- How to use it in an effective way, by giving my personal example.
What is Omnivore?
Omnivore is a read-it-later app to collect and process information that you find online. While retaining the original source. It can help you in finding, sifting through information and storing the result.
In the workflow that I will show you we zoom in on the process using the web browser. We will store the result in Obsidian, I will show you how to achieve this. Besides the web browser, Omnivore supports the following methods for collection information:
- Saving from Your Omnivore Library;
- Saving from a Browser (using the extension);
- Saving from a Phone or Tablet (iOS or Android);
- Newsletter Subscriptions via Email;
- Saving PDFs from a Mac.
For the other methods, you can find more information at: https://blog.omnivore.app/p/getting-started-with-omnivore
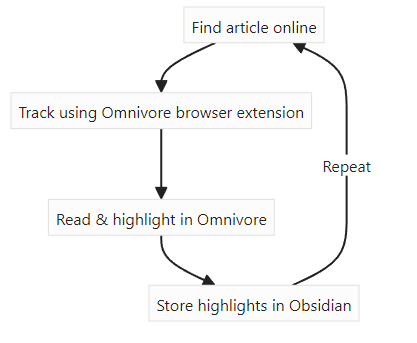
Omnivore Process
The process that we will realize is the following:
How to setup the Omnivore Integration with Obsidian
In this paragraph I will describe the necessary steps to setup the integration, using the browser extension for Google Chrome. The following steps are necessary:
- Sign up to Omnivore;
- Setup the browser extension;
- Connect Omnivore to Obsidian;
- Test the process.
Sign up to Omnivore
- Go to the Website: https://omnivore.app/
- Select Sign Up
- Select one of the options to create an account. This can be done by linking an existing Google or Apple account, or by creating a separate Omnivore account.
- For this example I will start with a separate Omnivore account.
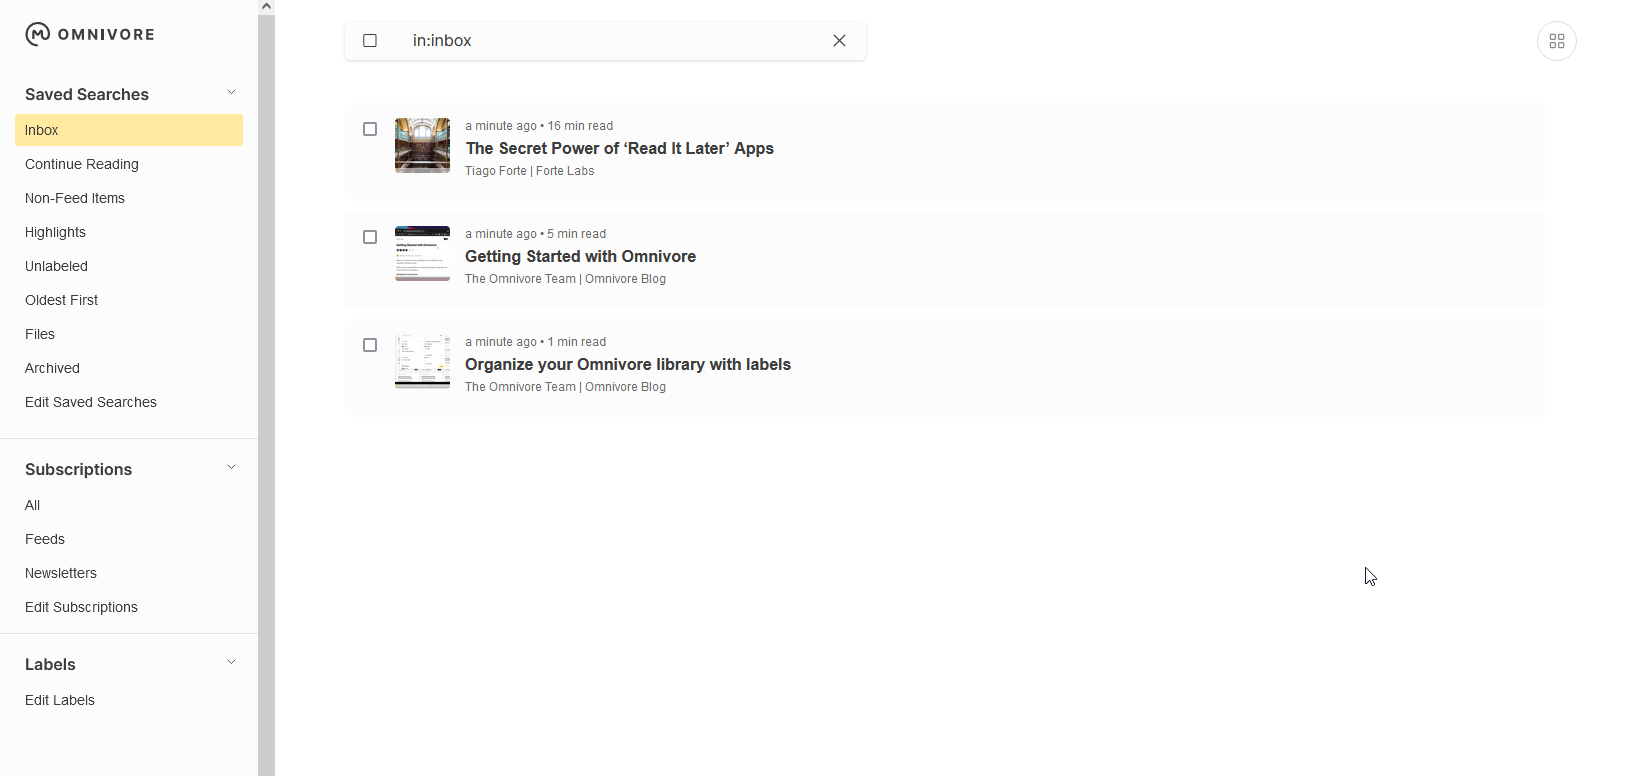
- An activation link will be sent to your e-mail, after activating you can login with your details. The following start page will appear after logging in:
Setup the browser extension
For this example we will use the extension for Google Chrome.
- Go to the Chrome web store;
- Search Omnivore;
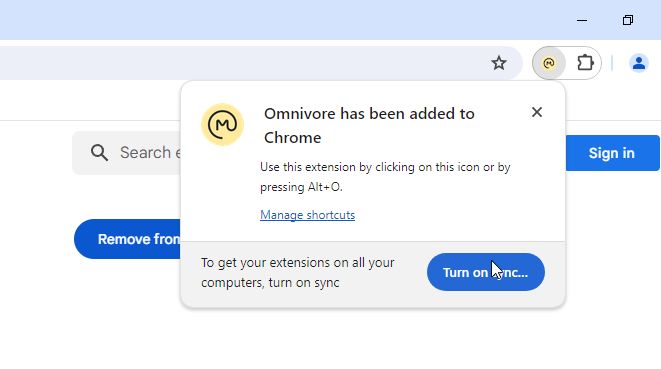
- Select Add to Chrome;
- Confirm to add the extension;
- The icon will appear on the right top, or under the puzzle icon;
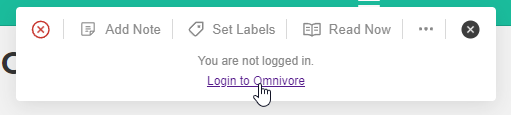
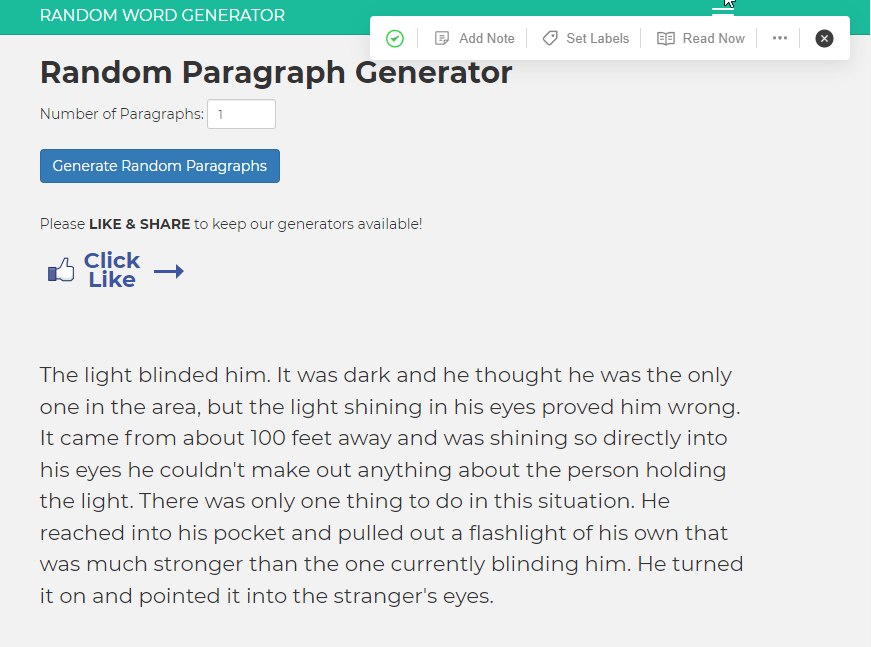
- Clicking the icon won’t do anything, until it recognizes a page with text. Navigate to a page with text, in the example we will use a random text;
- Click on the icon, login to Omnivore with your details;
- After that the icon on the right should change to a green check mark. This means that the article is saved to Omnivore;
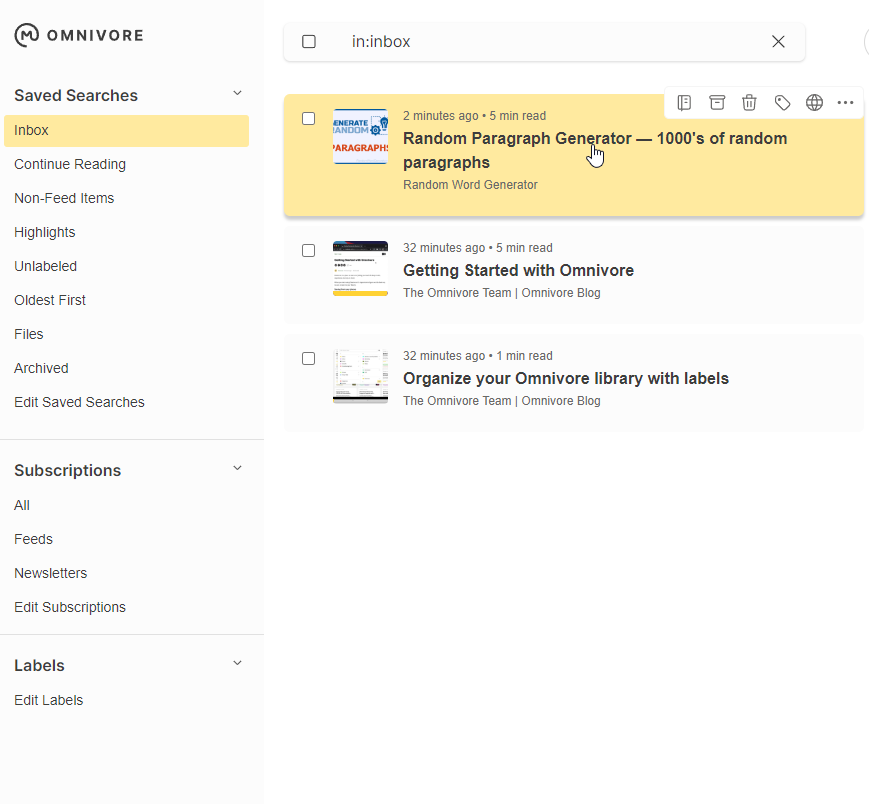
- When you go back to https://omnivore.app/ the article now appears in the inbox;
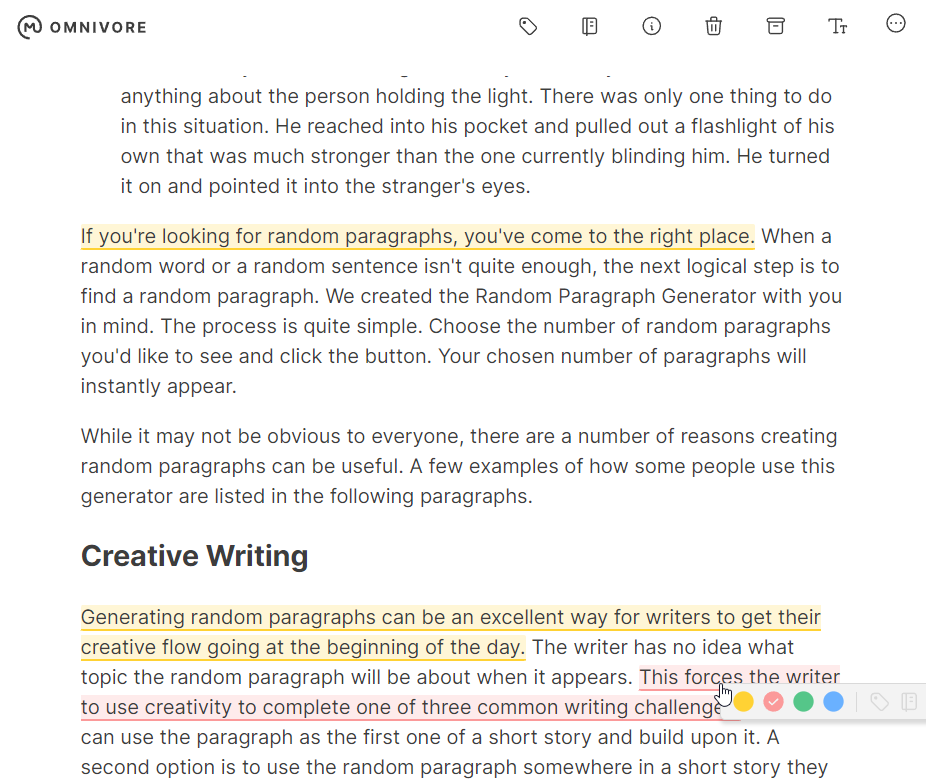
- You can start highlighting text that you want to save to your note. In the next paragraph we will explore how we can transfer the highlights to Obsidian.
Connect Omnivore to Obisidian
In order to transfer the most interesting parts of a text to our Obsidian Vault we can use the integration. To setup the integration follow the steps below:
- Open your Obsidian App;
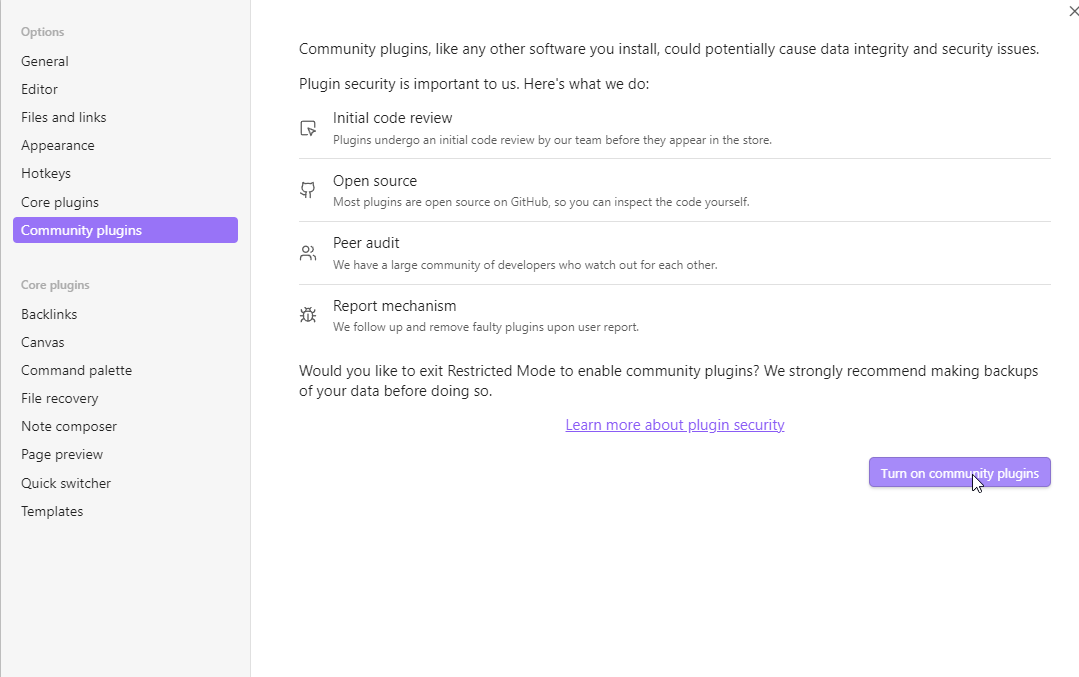
- Click on the gear icon in the left bottom;
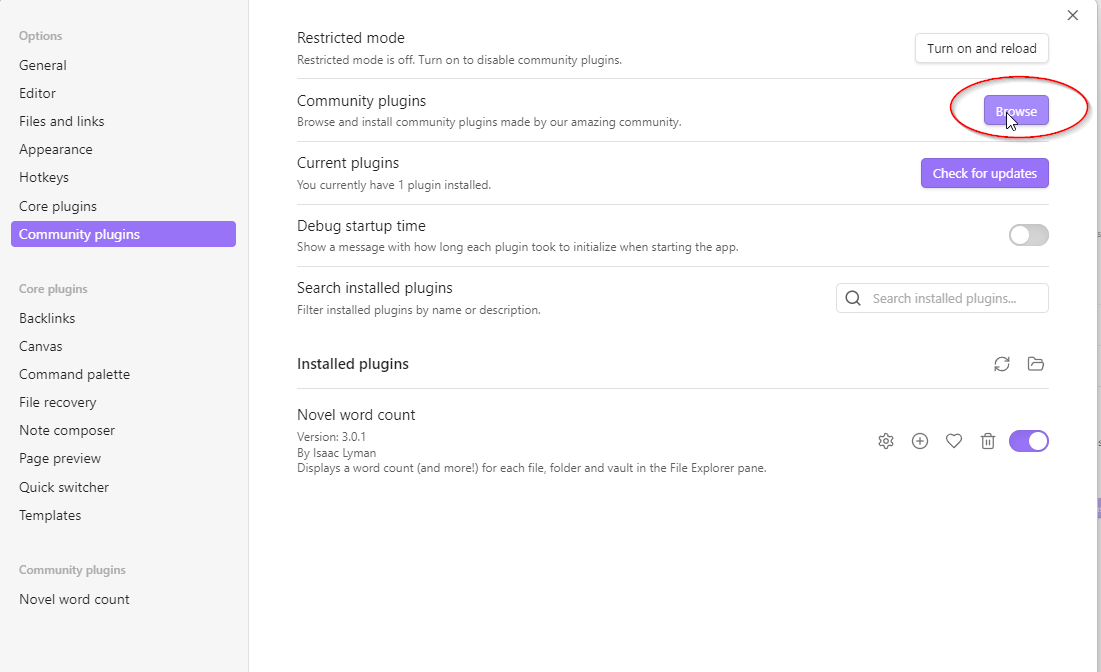
- Navigate to community plugins in the left menu;
- Click on “turn on community plugins”, this will require a restart of Obsidian;
- The window will change, now you can select “Browse community plugins”;
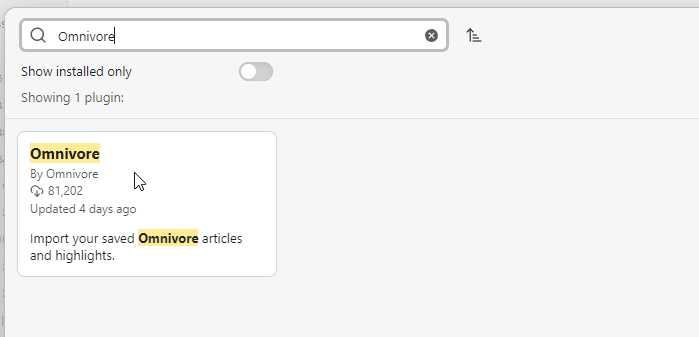
- Search “Omnivore” click and install the plugin
- After the installation is successful, enable the Omnivore plugin, by toggling it on;
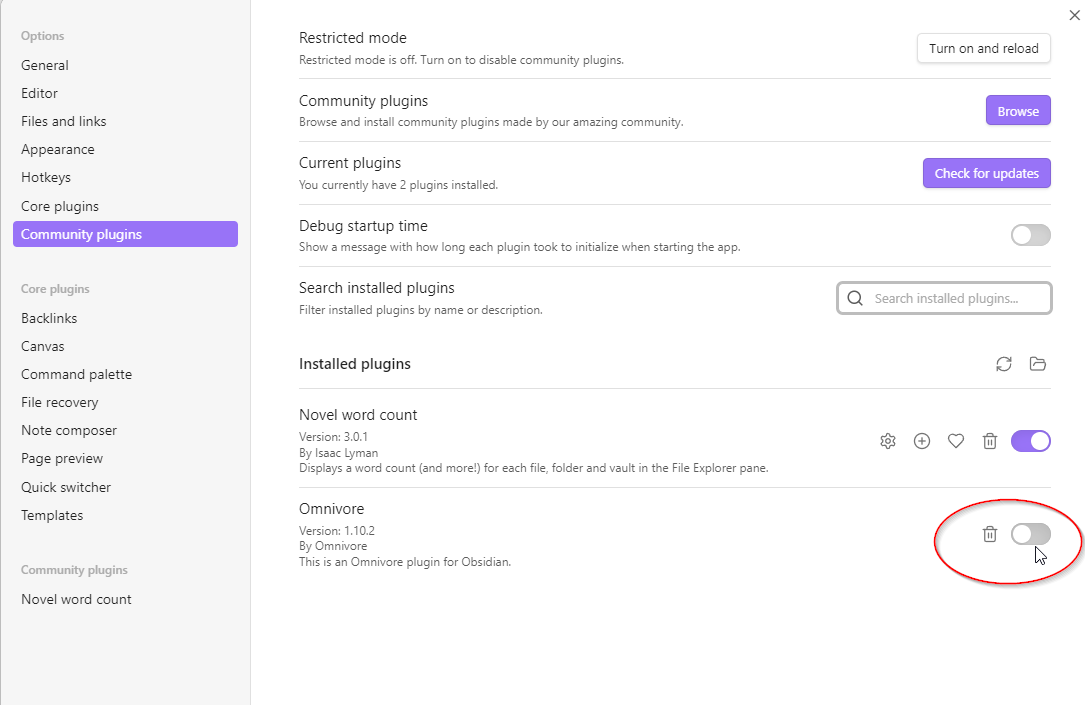
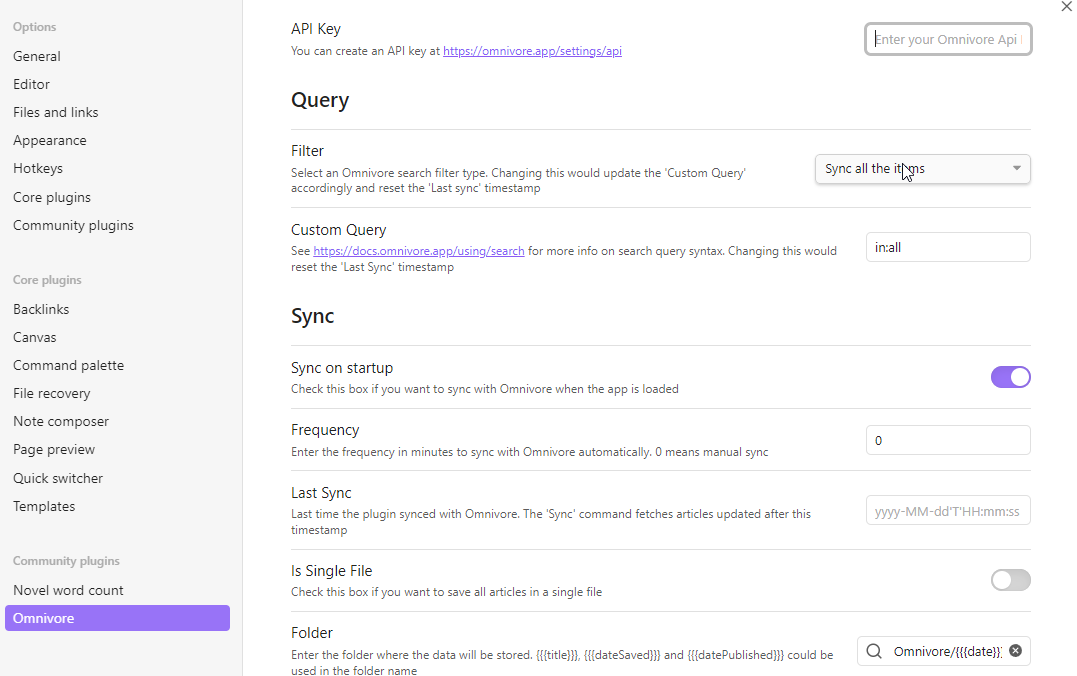
- A new option will appear in the left menu, we can click on “Omnivore”. It will request an API Key to function. This is an unique key we can use to integrate our Omnivore Account with our Obsidian Vault.
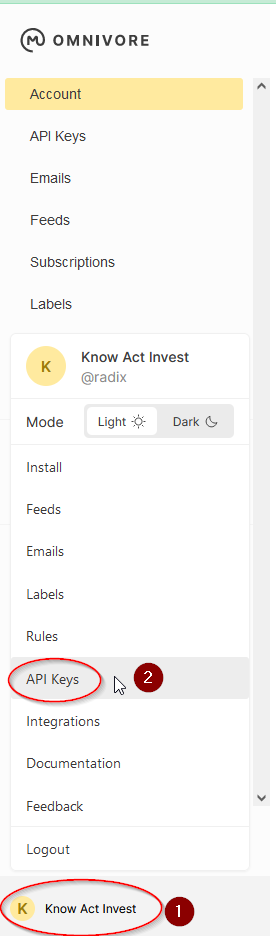
- The next step to finish the integration is to go back to https://omnivore.app/ and click on our account name in the left bottom;
- Click on “API Keys”;
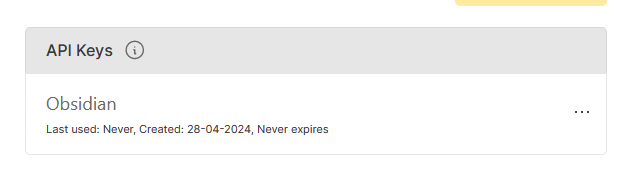
- Click on “Create an API Key”, fill in the name “Obsidian” this way you can always trace it back to this specific integration;
- Copy the key since it will only appear once. Beware: Keep the generated API key secret, since it grants access to your Omnivore Account;
- The entry for the key will be visible in the list;
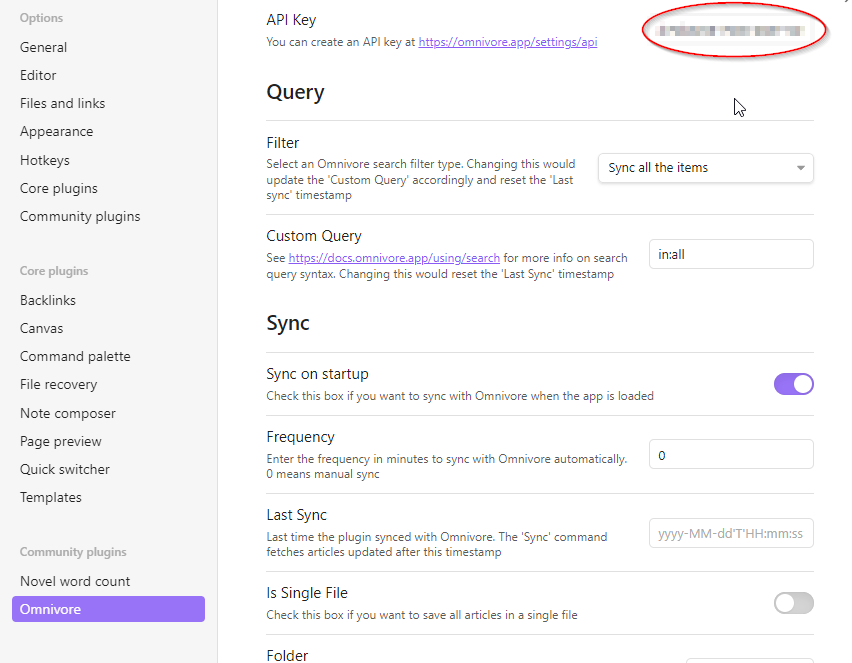
- The last step is to fill in this key into your Obsidian Plugin. Navigate back to your Obsidian settings, to the Omnivore App Settings. Paste the key into the Omnivore API Key field;
Congratulations, you have successfully setup the integration between Omnivore and Obsidian. In the next paragraph we will test the integration.
Test the process
To test the integration we will import the highlights from the randomly generated text.
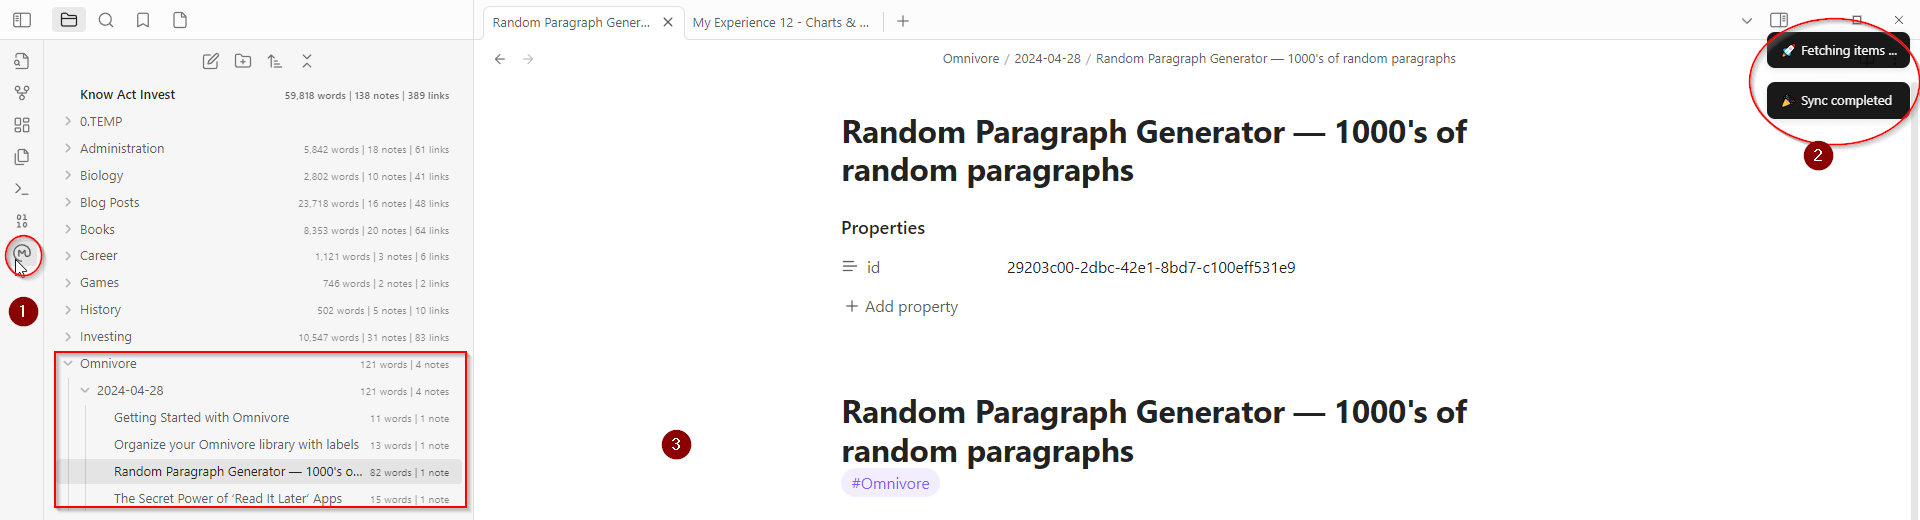
- Click on the Omnivore icon in the left menu;
- The plugin will now fetch all your article highlights;
- As you can see below the highlights are now imported. For every article that you read a note will be created in the Omnivore folder. The subfolders for each date that the article was imported in your Omnivore using the extension.
In this chapter we covered how to setup the integration between Omnivore and Obsidian. So that you can import highlights in the Obsidian Vault. To better process information, retain sources and enhance your note taking process. In the next chapter I will show you how to use this in an effective way.
Further settings
You can further customize this process, by changing the settings in the Omnivore plugin.
Such as a filter to only synchronize highlighted items:
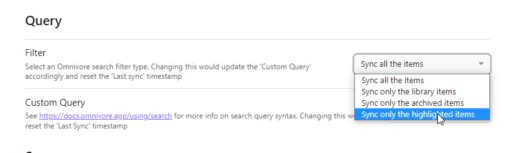
There are also settings to change date formats, the template for article import and synchronization frequency. For more information: https://docs.omnivore.app/integrations/obsidian.html#controlling-the-layout-of-the-data-imported-to-obsidian
How to use it in an effective way
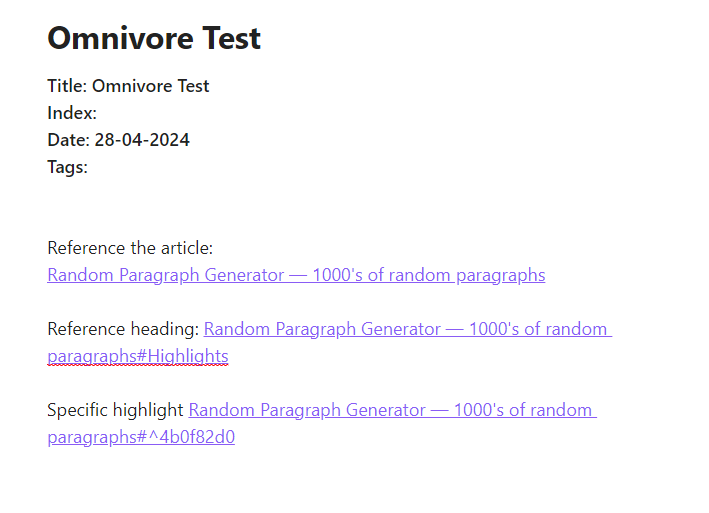
The article can now be used in your other notes. There are different ways to create references. Depending on your citation needs, you can change your approach. Three examples how you could use references to an imported article:
- The article, simply by creating a normal link using brackets;
- The heading, by using a normal link containing a hashtag;
- A specific highlight, by using a hashtag with a block reference. You can do this by using the number shown in the identifier next to the highlight in the imported Omnivore article.
Hopefully the information in this blog post can help enhance your flow of information. It certainly did that for me, because it is simpler to reference specific parts of articles without diluting your own notes.
- What are your ideas about this integration?
- Which other integrations would you like to see?
- How do you integrate references in your notes?
It would be nice to hear from you in the comments, please reach out. This gives me the opportunity to further tailor my content.
Related content
In the past I have written about Obsidian, since it is the application that I use daily. In this chapter a short overview of related Know Act Invest content that might be of interest.
Obsidian Canvas – Three examples
In this blog post I will give three examples of how I use the Obsidian Canvas in my daily work. These three will span a range of purposes, such as:
- Organizing Projects using Obsidian Canvas, including status tracking and relating information
- Applying the Principle; Connectivity of Thoughts
- Solve problems, combining Obsidian Canvas with the Fishbone diagram and Five times why
Zettelkasten in Obsidian
When I first found out about Obsidian I wrote a blog post about it: Zettelkasten in Obsidian – #5 My Experience In the post I outline how I applied the Zettelkasten principles in Obsidian.
Zettelkasten the ultimate guide
For a total overview of zettelkasten content, please refer to: “Zettelkasten – the ultimate guide” . I made this guide for those who are new to zettelkasten and look for a proper introduction. It also contains links to posts about my experience with applications for zettelkasten, including: Obsidian, Evernote, OneNote and Notion.
The guide also describes how I have configured Obsidian for my way of working.
