

Greetings and welcome to the ninth blog post of: My Experience. In the blog series I give insight into how I apply knowledge gained. For more information about this series click here. In this blog post I describe my experience with Zettelkasten in Logseq. Currently I am using Obsidian, but I am always on the lookout to try new software. So I can give you an idea of how I would make a Zettelkasten using different software. For every post I will come to a short conclusion where I outline the strong points and points for improvement, based on my experience.
Table of Contents
Introduction to zettelkasten
There is “Zettelkasten – the ultimate guide” here you can find all our zettelkasten content. I made this guide for those who are new to zettelkasten and look for a proper introduction. It also contains links to posts about my experience with applications for zettelkasten, including: Obsidian, Evernote, OneNote and Notion.

The zettelkasten blog posts are the most read posts of the website. Know Act Invest Readers want to know how to use Zettelkasten. This blog post will use a comparable writing structure, so it is possible to compare tools. I will do so by using two Zettelkasten principles; the principle of atomicity and connectivity. More about these further down.
About Logseq
Logseq is a privacy-first, open-source platform for knowledge sharing and management. The project started in 2020 and has been open source ever since the alpha. That means people can get the source code of the software and make their own versions as they please.
In this about logseq section I will give you information to get started:
- Logseq philosophy: The reason the tool exists and guiding principles as expressed by the creators.
- How to access Logseq: The steps to get Logseq and supported platforms.
- How to configure Logseq: Steps for basic configuration to start using it.
- Markdown or Org Mode: Some information about the mark up languages that Logseq supports.
- Backlinks: The core of Logseq, the option to connect pages with the ultimate goal to create connectivity of thoughts. As described by Sonke Ahrens in How to take smart notes; more in my post about the book.
- Navigation: In this section I will explain the options in the menu bar, including the graph view and journals.
- Block References: How to integrate references in your notes.
- Templates: A feature that I use extensively in Obsidian, in this paragraph I will explore the options that Logseq offers.
- Flashcards: I noticed that by default Logseq supports Flashcards, in this paragraph I will explore the benefits.
- Queries A handy tool to dynamically add content based on a query within your note.
Logseq Philosophy
I have read the documentation to understand the principles that underlie the Logseq project, the following points stood out:
- Open Source: Everyone can access the source code of Logseq. Which means developers can make their own version of the app; the source code is redistributed and modified by many people.
- The user is king of the data: The creators adhere to the local first principle, this means that the user can put their notes wherever they want. Without being forced to store notes in the cloud.
- Logseq doesn’t lock data: The tool is an outliner that doesn’t lock your data, but rather saves it in files. These are in standardized formats like Markdown or Org mode, so you can easily switch to another application.
- Build your own workflows: There is a marketplace within the app where you can choose from hundred’s of plug-ins to extend and customize Logseq to your liking. This will help you to build your own workflow.
- Being different than others tools: Supports org mode’s task management, queries and journals. More about these features further down.
How to access Logseq
At the time of writing Logseq is available for Microsoft Windows, Linux and Mac OSX. For an up to date overview go to this page. The great thing that you don’t need to create an account.
They also have a web version of the application which can be used from the browser, it can make use of local files on your computer. This only works with Google Chrome or Microsoft Edge. You can do this by going to the website and click “Open a local folder”.
How to configure Logseq
The steps required to get Logseq up and running. It is quite easy, for this example we will use the desktop app:
- Go to the website and download the app
- Open the app, it will prompt you to open a local directory. This will be the location where all your notes will be stored. You can also use an existing folder with Markdown or Org mode files.
- That’s it, the app will create the required folders and you can get started. Remember to choose a folder that is in a secure location. Personally I put my markdown folders in OneDrive sync folder, every time I edit a note it will be saved automatically to the cloud.
Markdown or Org Mode
Logseq currently support two syntaxes. Markdown and Org Mode. The preferred fileformat can easily be switched in the settings. In this paragraph I give a short introduction to both.
Markdown
Logseq makes use of the markup language “Markdown”. The language is based on the idea of: “What you see is what you mean” Which is derived from “What you see is what you get”. In practice this means that Markdown allows you to form a text without actually looking the same as the end product. Markdown files need to be compiled into a final format before getting their style. The reason this is done so you can focus on writing and structuring your text, you won’t get distracted by unnecessary styling.
A few examples of Markdown notation:**Bold** -> Bold_Italics_ -> Italics~~Strikethrough~~ -> Strikethrough^^Highlight^^ -> Highlight`Code`-> Code[label](https://example.com) -> label
For more examples see: https://docs.logseq.com/#/page/markdown
The great thing about Logseq is the large amount of available documentation. Basically set-up in the same way their application functions. This means it is easy to navigate the documentation. There is even a graph view available for their website Link to graph
Org Mode
Logseq also supports Org Mode. This is another mark-up language for designing notes, planning, programming and authoring. Org mode was created by Carsten Dominik in 2003. Originally this standard was designed for Emacs, a text editor for operating systems such as Linux, BSD and MacOS.
A few examples of Org Mode notation:*Bold* -> Bold/Italics/ -> Italics+Strikethrough+ -> Strikethrough^^Highlight^^ -> Highlight~Code~ -> Code[[https://www.example.com][label]] -> label
For a comprehensive guide on Org Mode you can read: https://orgmode.org/worg/
Backlinks
The core feature of any Zettelkasten is to connect your ideas (notes). You can use backlinks to achieve this. By typing double brackets:

In this example you can see that I type “zet” between the brackets, this will automatically search through existing notes. You will be able to one or select “New page:” which will create a new note with your search term as title.
Navigation
In the picture below you can see the interface. For every menu item I will give a short explanation and tell you how I used it.

- Journals: Every time that Logseq opens it will create a new journal page. This is the central starting point; where you can write a daily note and connect your separate pages (notes) back to the journal. Personally I don’t write journals, I do think this is an original approach, that incentives you to link notes back to the journal, but I rather connect notes based on the information they contain.
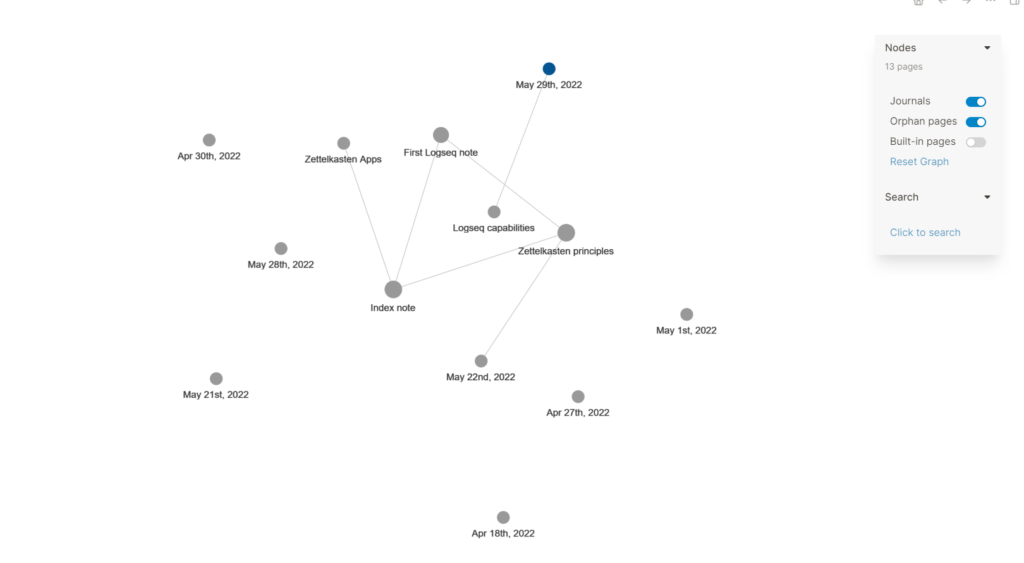
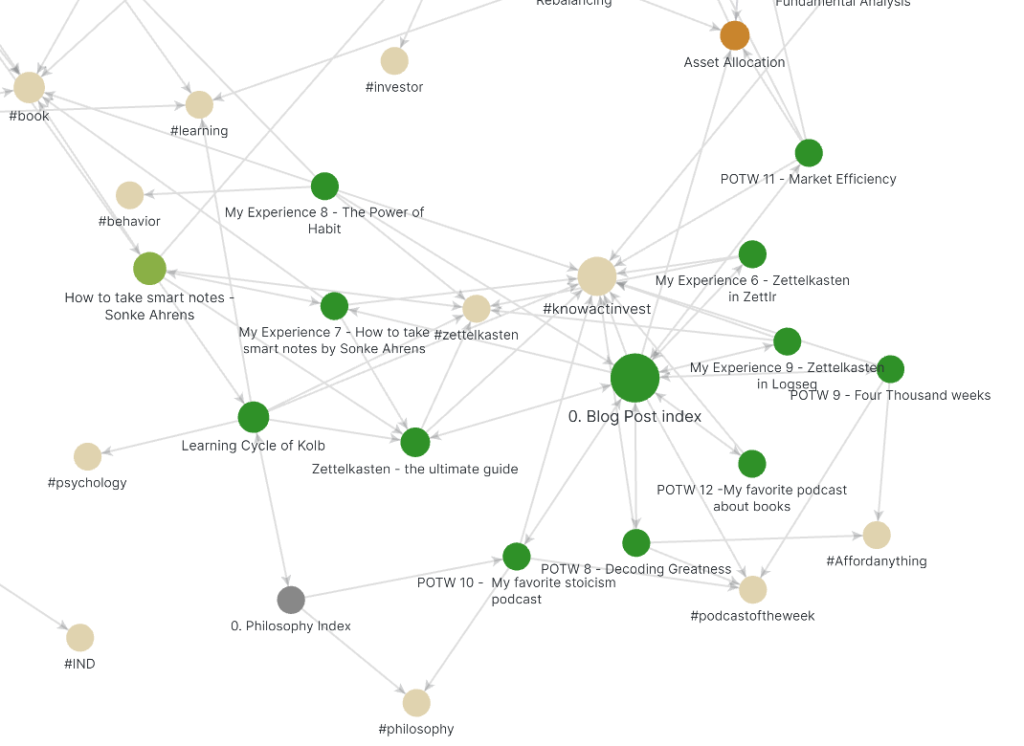
- Graph view: Gives an overview of all pages and their backlink connections. In the graph option menu on the right you can determine what it shows. In the example below I turned on journals and orphan pages (without backlinks). Obsidian also has a graph view, I use it to quickly navigate to notes. It can also serve as inspiration just by looking at the notes and creating new backlinks. This will enhance connectivity of thoughts, this can also lead to new ideas/notes to extend your body of knowledge.
- All pages: The option will show you all the pages in a list view. Since the “Recent” section in the menu bar has limited space and the graph view can be hard to navigate when it grows. This view by default excludes journal entries, they can be shown by clicking “All files”. The All pages feature can be handy to quickly find the right information, based on keywords, or dates.

- New page: Opens a search window, this is great since it forces you to type the name of the supposedly “new” note you want to create. It wouldn’t be the first time that I try to create a note on a subject that could easily be a heading in an existing note. By forcing you to search first, this feature reminds you of preexisting content. Thus keeping your body of knowledge lean.

Block References
Because Logseq pages consist of blocks we can create windows to other notes by using references. This shows the content of a linked block directly in your note. The feature exists to reduce duplicate content. Read more about the different methods to achieve this on: https://docs.logseq.com/#/page/the%20basics%20of%20block%20references
Personally I used the “Copy block embed” after right clicking on the dot in front of the section.
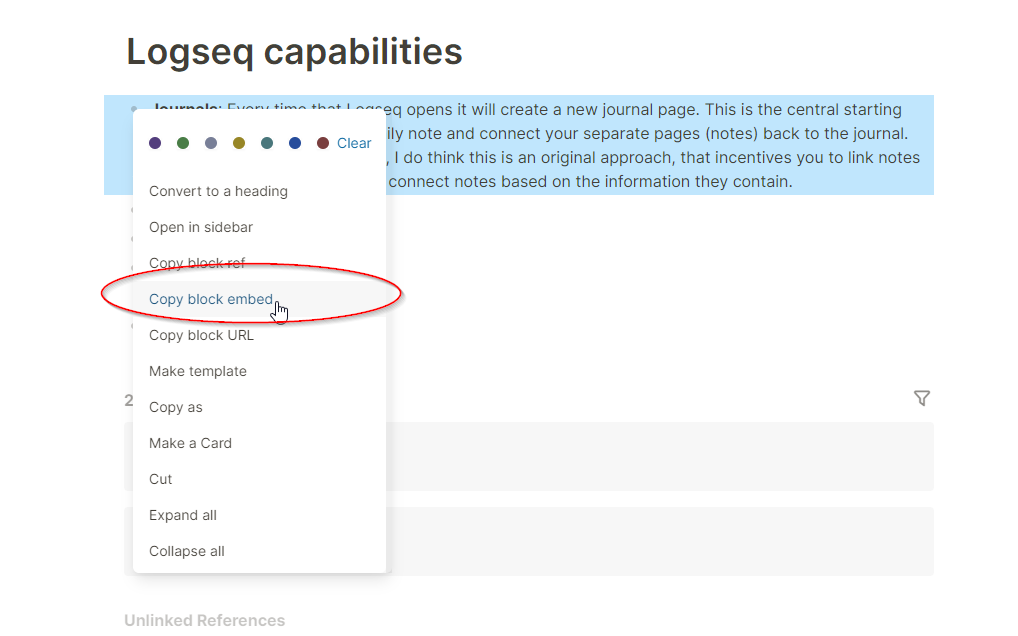
After pasting it will look like:

Templates
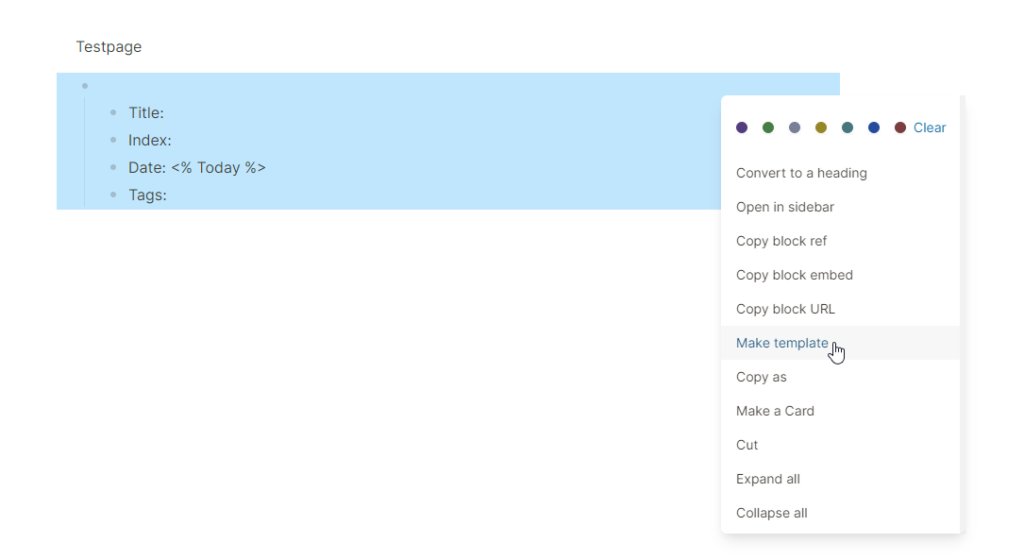
Templates can greatly improve consistency of note taking by registering important information. In Obsidian I also use templates, which contains the following information; Title, Index, Date, Tags. I will try to recreate this template in Logseq. You can simply place the template content in one block; followed by the content indented. Then you right click on the dot in front of the block and select “Make template”
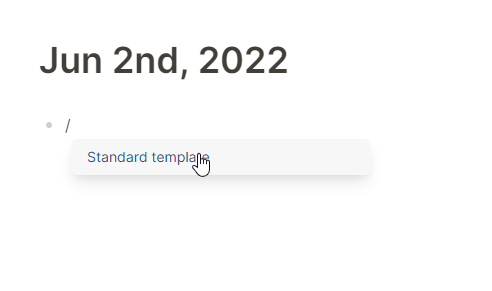
After creating the template you can use it in journals and notes by typing: ” “/Template” and pressing Enter. As can be seen below you see the list of bullets marked as template, in my case it is called “Standard template”. Which says something about my ability to think of original template names:
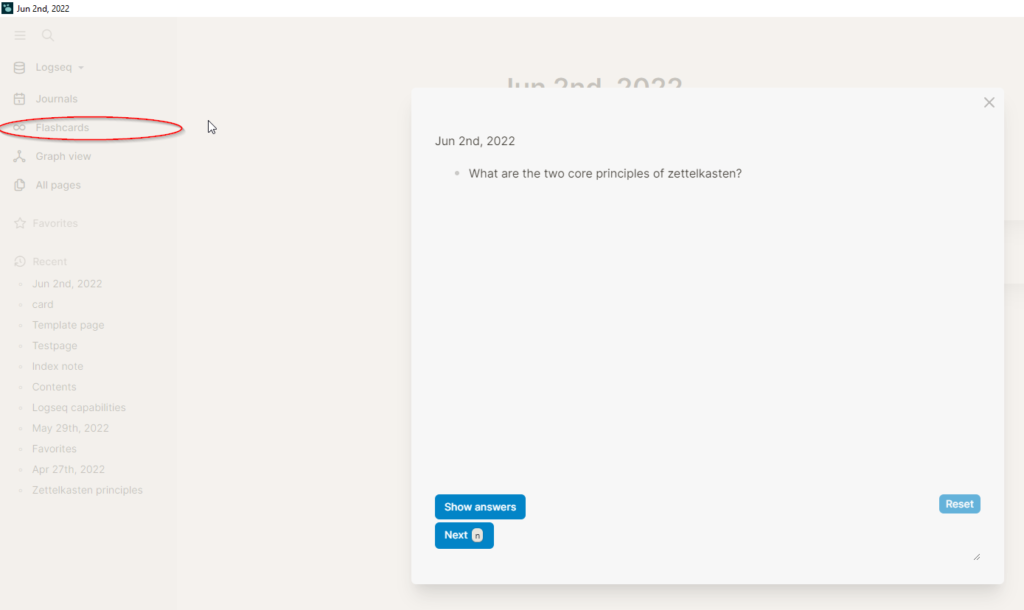
Flashcards
We can use the flashcard feature to practice questions, this could be handy if you want to learn short bits of information. You can create a flashcard by placing “#card” behind the question. Followed by the answer in a sub bullet point.

To start the questionnaire click on the “Flashcards” button in the menu on the left. The subset can be randomized or selected from different notes. Personally I used flashcards in the past to learn for exams, I can see this as beneficial because you can create them while writing your permanent notes.
Queries
This functionality gives you the ability to have dynamic content within notes. In essence this means that information is not static but updated by a real-time query into your database of notes. The advantage of this function is that you can use it to group content together, without having to manually update an index. Personally I use indexes in Obsidian, to group information together. In Logseq you could use queries to create these.
In this simple example I have queried the word “Zettelkasten” to get all notes this word appears in. It is possible to create more advanced queries, for example based on conditions, tags, properties etcetera.
For more information about how to make advanced queries: https://docs.logseq.com/#/page/queries

Apply Zettelkasten principles in Logseq
The main goal is to use the software as described by the Zettelkasten system, to see how we can apply this in Logseq.
The Zettelkasten system uses two principles: The first: the principle of atomicity, based on an unique numbering system. This means that you put information that belongs together on a single note with an ID. So the ID can be used as a reference. The second is the principle of connectivity. In other words, connecting notes with the goal to generate new ideas.
Principle of Atomicity
The goal of this principle is to group related information. This makes notes easier to find and relevant.
In the Zettelkasten system this works by giving an ID. For example the ID: 1A for a note about Value Investing. Then 1B for a related note about a valuation method. 2A for the first note about active investing and so on. This grouping method works great if you have physical drawer with notes. But nowadays there are different ways to go about this, most software contains a search option to find notes based on title. In Logseq I used the following components to adhere to the principle of atomicity, for more details for each component check the “About Logseq” chapter in this article:
- Block references: Gives you the option to reference specific bits of information from other pages. This can be used to concentrate/group related content whilst avoiding duplicate info.
- Queries: A great feature that lets you build advanced queries that get dynamically updated. This will ensure you don’t have to update your indexes manually, which can become a chore when your database grows.
Principle of Connectivity
The principle of connectivity has the goal to create new ideas from connecting notes. For example, In EverNote I used tags to do this, separate from the layered structure. In Logseq I combined different features to enhance connectivity of thoughts.
- Backlinks: The bread and butter of Markdown. This feature is most important for creating the connections between your pages, while also
- Tags: Help you group information together based on characteristics, independent from backlinks.
- Graph view: Actively using backlinks and tags will result in a graph with substance. Over time as your body of knowledge grows, the graph can serve as overview. This will help you to zoom out and see the bigger picture. I use the graph to; create connections, come up with ideas and find information. Below a screenshot my graph in Obsidian, notes that are connected to the blog post index;
Conclusion: Zettelkasten in Logseq
In conclusion: I think Logseq offers an unique approach. It adheres to the philosophy of the community that created it. The default options are plentiful; think about the components like journals, queries and flashcards. These make Logseq stand out, by combining functionality of similar tools.
As described it fully supports the core principles of Zettelkasten. Personally I will keep using Obsidian because I already designed my personal workflow. I think Logseq can be a great starting point for people who are experimenting with the components for their workflow, without having to install additional plug-ins.
If you want to follow my Zettelkasten journey, go to “Zettelkasten – the ultimate guide” That page will be kept up to date my most recent Zettelkasten insights.
Logseq advantages
It is easy to configure, available for different platforms, supports Org Mode alongside Markdown. If you get stuck there is plenty of documentation available on the website. The tool is being constantly improved by the community.
Logseq links
Great documentation: https://docs.logseq.com
Helpful instruction videos: https://www.youtube.com/c/OneStutteringMind
Logseq Github: https://github.com/logseq
Want to learn more about Zettelkasten?
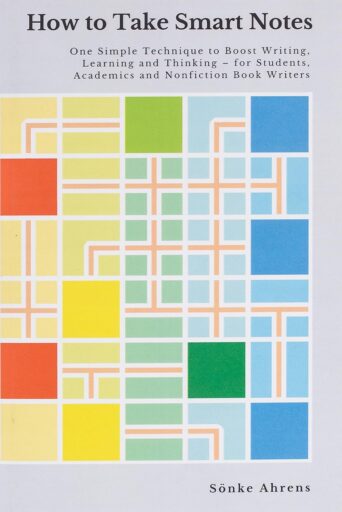
Then I recommend the following book. This is the step-by-step guide on how to set up and understand the principles behind the note-taking system that enabled Luhmann to become one of the most productive and systematic scholars of all time: How to Take Smart Notes: One Simple Technique to Boost Writing, Learning and Thinking – for Students, Academics and Nonfiction Book Writers. (as an Amazon Associate I earn from qualifying purchases) You can also first read my blog post about the book, where I describe the core concepts, so you can better determine if it suits your needs: How to Take Smart Notes – #7 My Experience.
What are your experiences with Zettelkasten?, Which software do you use? Let me know in the comments, I am eager to hear from you.
Thanks for taking an interest in this post, I would really appreciate it if you would leave a comment with feedback. This helps me to continuously improve the website.